

You’ve done the work, marketed your free digital offer, and hurrah you got someone to opt into it!
Now what?
Don’t make the mistake of putting tons of time into creating your digital workbook or file and then totally leaving the person hanging. Creating an efficient workflow to connect with this new client after they sign up for your freebie or product is crucial in maintaining a long-term relationship with them. It can help you maintain a smooth and seamless customer experience from their first interaction with you.
At Quill & Co we use Flodesk, an email marketing platform. It helps us easily create workflows that keep our customers engaged and informed about the offer. In this blog post, we’ll explore how to create a workflow in Flodesk after someone opts into your offer.
Create a new segment for your offer
Inside Flodesk, under the “Audience” tab, you need to create a new segment. This is to filter your audience that opts into the offer. Name it something that has to do with the offer they are receiving. If you use a checkout system outside of Flodesk for your digital product, you can have something like Zapier automatically put them in this segment when they opt in.
Create an Email Workflow
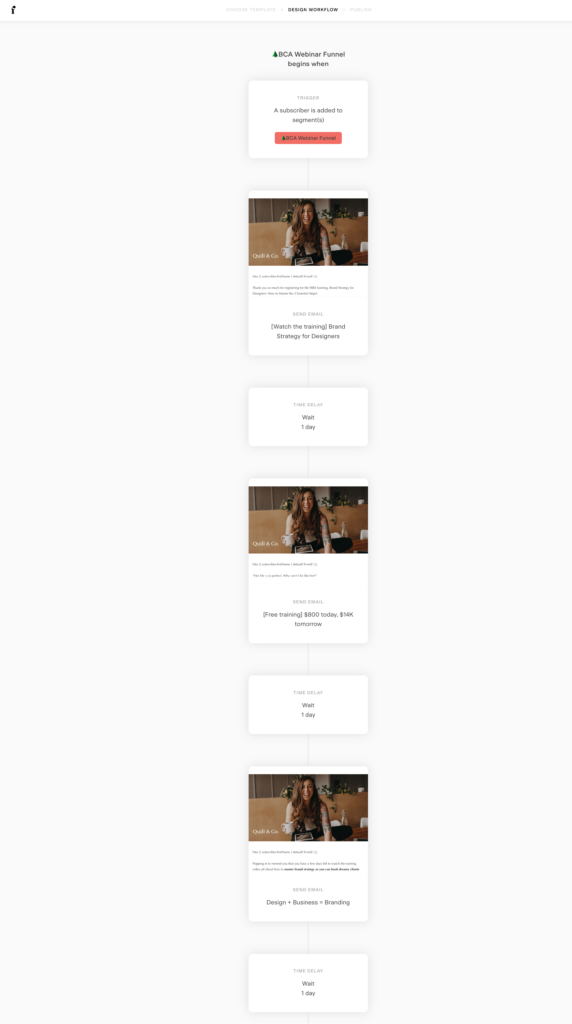
Next, it’s time to create a workflow. Click on the “Workflows” tab in your Flodesk account, and then click “New Workflow”
From here, you can either choose a template inside of Flodesk are “start from scratch” and customize the workflow to match your branding. We like to start from scratch so we can use one of our past emails to keep all of the branding elements consistent across workflows and regular newsletter emails.
You will then name your workflow, again something that pertains to the opt-in itself, and choose the trigger. The trigger typically is when someone is put into a segment group. Like the one, you created in the previous step. So anytime someone opts into your freebie they are automatically put into this workflow.

Add Email Sequences
Now that you’ve set up the trigger, it’s time to add emails to your workflow. These are the emails that will be sent to customers after they opt into your offer. We recommend sending out a confirmation email right away with details on how to get access the offer.
Flodesk makes it easy to create beautiful email sequences with drag-and-drop design tools so you can keep everything looking on brand (which you know we love around here). You can customize the layout, add images, and include personalized content based on your offer.
I recommend a sequence with at least 3-4 emails, and spacing the emails 1-2 days apart.
Here are 7 ideas for some email sequences you may want to include in your workflow are:
- Order Confirmation: This email confirms the customer’s purchase and provides details about the product and delivery.
- How-To Email: If you feel like your offer needs a bit more background or explanation you can do so in this email. List out ways to use, and how to use it, and offer a chance for them to share with you how they used your offer in their own business. This is also a great place to put a second set of instructions on how to access the offer.
- Story/ Your “Why” – a backstory about how and why you created this offer or even how you became a designer. This is your chance to get the client to know a bit more about you and the why behind your offer. This is also a good place to upsell/cross-sell your services. You can lightly mention in this email, related products that the customer may be interested in purchasing.
- Review Request – This email asks the customer to leave a review of the offer. This is a great way to start a conversation with your audience all while gaining feedback. Positive feedback and testimonials can then in turn be used in marketing for this opt-in to show credibility.
- A funny story about you relating to your services – People buy from people. The more human you can make yourself the more likely your audience is to stick around. This is a great chance to tell a bit more about your background, maybe an embarrassing or relatable story, and relate it back to you and your business.
- Upsell Emails – Every opt-in or offer should have a goal in mind. Sometimes it is simply to grow your email list but other times you may use it to promote a paid product or service you offer. This is your chance to upsell to the next way to work with you and your business. For pricing and services, I would focus a lot on case studies and testimonials here.
- A Thank You Email – While you should initially thank them in the first email in the workflow, you could always add an additional email thanking them. You could dive deeper into your personal interests, your life outside of your design business, and what their opt-in means to you. Also, let them know other ways to connect with you like DM’s or hitting reply.
Test and Launch Your Email Workflow
Before you launch your workflow, try testing it to make sure everything is working correctly. You can use Flodesk’s “Test Flow” feature to test your emails and make sure they’re going to the right customers at the right time.
Once you’re confident that your workflow is working correctly, it’s time to launch it. You can activate your workflow with a simple click of a button.
Creating a workflow in Flodesk after someone opts into your offer can help you provide a better customer experience and increase sales. With Flodesk, you can create beautiful email sequences that keep customers engaged and informed. By following these steps, you’ll be able to create a workflow that is tailored to your business and helps you achieve your goals.
A heads-up that this blog post includes affiliate links. All the words are my own and I only recommend products that I use and love.
free

Get Access Now!
